-
Shop
- Advanced Technologies
- AI Skills Mastery 2026 Collection
- Best-Sellers
- Calvin Klein
- Car Accessories
- Car Buying & Ownership
- Dating & Social Skills
- Denim
- 7FOR
- AGOLDE
- Antony Morato
- Armani Exchange
- Boss
- Brunello Cucinelli
- Calvin Klein Jeans
- Costume National
- Desigual
- Diesel
- Dolce & Gabbana
- Dsquared²
- Ermanno Scervino
- Fendi
- Gianni Lupo
- Guess Jeans
- Ichi
- Just Cavalli
- Lee
- Levi's
- Liu Jo
- Morgan De Toi
- Mother Denim
- Only
- Pepe Jeans
- Pinko
- Replay
- Tommy Hilfiger Jeans
- Valentino
- Vero Moda
- Digital Resources
- Education & Learning
- Family & Parenting
- Fashion
- Alexander McQueen
- Bags & Wallets
- Balenciaga
- Belts
- Bottega Veneta
- Brunello Cucinelli
- Burberry
- Chanel
- Chloé
- Dior
- Dolce & Gabbana
- Etro
- Fendi
- Gucci
- Hats & Hair Accessories
- Jacquemus
- Jewelry
- Jil Sander
- Jimmy Choo
- Keychains
- Kiton
- Miu Miu
- Off-White
- Prada
- Rick Owens
- Saint Laurent
- Shoes
- Socks & Tights
- Sunglasses
- The Row
- Tom Ford
- Valentino
- Valentino Garavani
- Versace
- Vivienne Westwood
- Watches
- Fashion & Style
- Fashion Accessories
- Financial Education
- Find Your Path Collection
- Fitness
- Furniture
- Gadgets
- Health & Beauty
- Health & Wellness
- Home & Garden
- Home & Kitchen
- Home Styling & Organization
- Home Supplies
- Kids & Babies
- Kitchen
- Lighting
- Nike
- Online Business
- Online Business for Beginners
- Parenting
- Patio, Lawn & Garden
- Personal Growth
- Pet Care
- Pet Supplies
- Pets
- Smart Life with IA
- Sport & Outdoors
- Super Deals
- Travel
- Wealth
- Wealth Building
- Wellness
- YouTube Shorts Best-Sellers
- Popular
- Best deals
High-Impact DIY Kitchen Upgrades You Can Finish in a Weekend
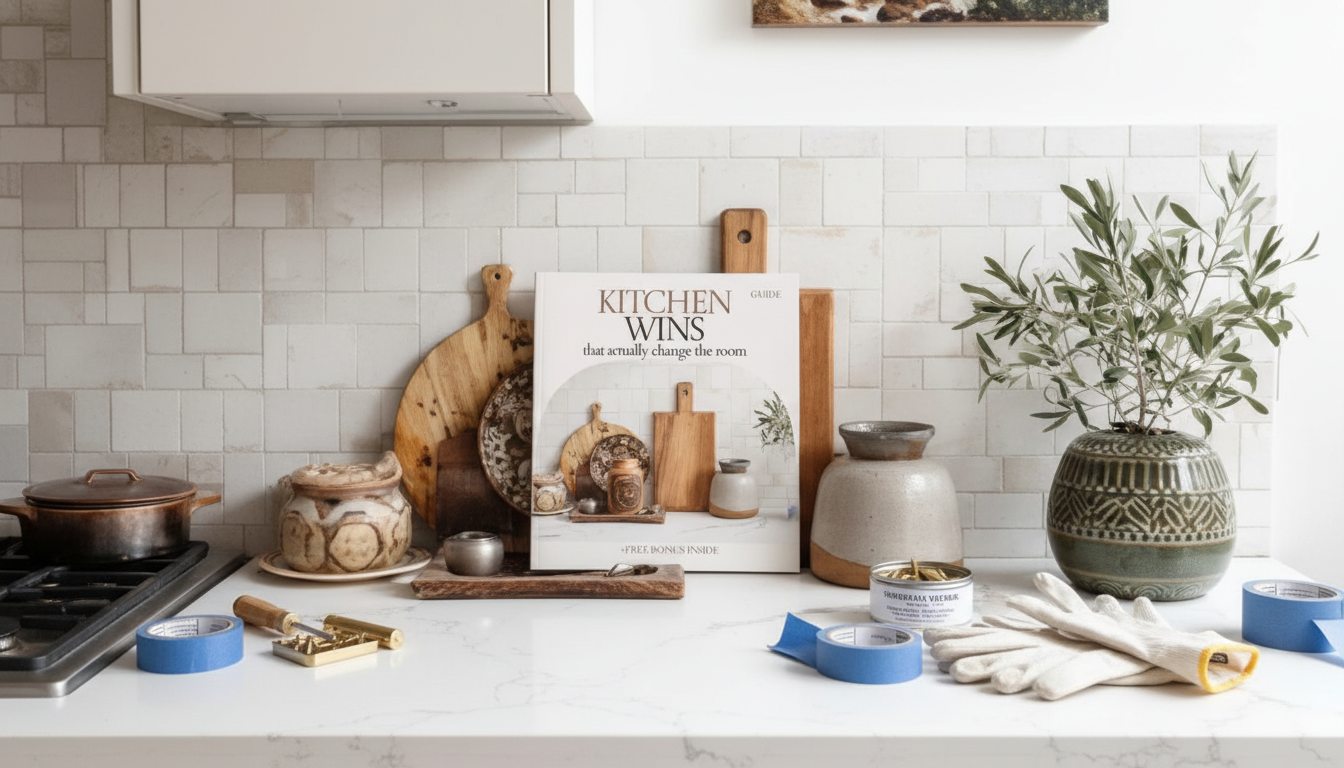
Kitchen Wins That Actually Change the Room: Simple DIY Upgrades With Big Impact
Small, targeted changes can make a kitchen feel brighter, more modern, and easier to use—without a full remodel. The biggest “wow” shifts usually come from a handful of levers: light, sightlines, surfaces, and the little details your hands touch every day. Below is a practical, weekend-friendly plan that starts with what changes the room the most, then moves into projects you can finish without living in a construction zone.
Start With a Fast Room Check: Light, Lines, and Clutter
Before buying anything, do a quick scan that helps every upgrade land better.
- Walk the kitchen three times: morning, evening, and with all lights on. Note dark corners, glare on counters, and shadowy work zones (especially by the sink and stove).
- Stand at the main entry and notice the first thing your eyes hit. Pick one “hero” area—sink wall, range wall, or island—to upgrade first so the room feels intentionally updated.
- Clear counters for 24 hours. Track what comes back daily and plan storage for the rest; otherwise, new finishes get visually “buried” under clutter.
- Measure once, then shop: cabinet pull hole spacing, backsplash square footage, and faucet mounting holes.
Lighting Changes That Transform the Whole Space
Lighting is the fastest way to make a kitchen feel newer because it affects every surface at once—cabinets, counters, and even wall color. If fixtures feel dated or your counters are always in shadow, start here.
- Swap outdated ceiling fixtures for simple, clean silhouettes. For a cohesive look, match metal finishes to existing hardware (or plan a coordinated hardware refresh next).
- Add under-cabinet lighting to eliminate counter shadows. Plug-in LED strips and puck lights are a no-electrical option with a surprisingly “high-end” payoff.
- Choose bulb temperature on purpose: 2700K–3000K reads warm and inviting; 3000K–3500K feels brighter and more task-focused.
- Install dimmers where appropriate so the room can shift from cooking mode to hosting mode.
For more guidance on efficient lighting options, see ENERGY STAR lighting recommendations.
Quick DIY Upgrades Ranked by Impact
| Upgrade | Difficulty | Typical time | Budget range | What changes visually |
|---|---|---|---|---|
| Under-cabinet lighting | Easy | 1–2 hours | $25–$150 | Brighter counters, fewer shadows, modern feel |
| Cabinet hardware swap | Easy | 1–3 hours | $30–$200 | Instant style shift; ties finishes together |
| Faucet replacement | Medium | 1–2 hours | $75–$300 | Sink area looks newer; improves usability |
| Backsplash refresh (peel-and-stick or tile) | Medium | 4–10 hours | $50–$400 | Adds color/texture; defines the room |
| Paint cabinets or walls | Medium–Hard | 1–3 days | $50–$250 | Largest surface update; dramatic change |
Hardware and Fixtures: The Easiest “Before/After” Upgrade
If the kitchen works fine but looks tired, hardware is often the cleanest visual reset. It’s also forgiving: you can finish it in an afternoon and immediately see the difference.
- Pick one finish family (brushed nickel, matte black, champagne bronze) and repeat it at least twice—pulls + faucet, or pulls + light—for a coordinated look.
- Count every door and drawer, then buy about 10% extra for mistakes or future replacements.
- Use a drilling template or jig to keep handle alignment consistent. Slightly crooked pulls read as “DIY” from across the room.
- Consider soft-close hinges only if existing hinges are worn; otherwise, a clean hardware swap is usually enough.
Backsplash and Wall Wins That Add Depth
A backsplash refresh is one of the best ways to add texture and definition—especially when cabinets and counters are neutral. The key is planning the layout so it looks intentional, not patched together.
- Choose a backsplash that contrasts the countertop slightly (not a perfect match) to create depth. Even subtle contrast can make counters look more “finished.”
- For rentals or low-commitment updates, peel-and-stick tiles can deliver the look. Prep matters: degrease thoroughly so the adhesive can actually bond.
- For real tile, plan the layout from the most visible centerline (often behind the sink or range) to avoid skinny end cuts that look like an afterthought.
- Make grout color a deliberate choice: matching grout hides lines for a calmer look; contrasting grout highlights pattern.
In cooking zones, keep safety in mind—especially behind ranges. The NFPA’s home cooking fire safety guidance is a smart quick read before installing materials near heat.
Paint and Surface Refresh That Doesn’t Look Cheap
Paint can deliver the biggest transformation per dollar, but only if prep is treated like part of the project (because it is).
If you’re painting or using adhesives, pay attention to ventilation and product selection. The U.S. EPA’s overview of VOCs in indoor air is helpful for understanding why low-odor, low-VOC options can be worth it in a kitchen.
Storage Tweaks That Make the Kitchen Feel Larger
Weekend Plan: One High-Impact Upgrade Per Day
Tools, Checklists, and Digital Guides (Optional but Handy)
Avoid These Common DIY Mistakes
FAQ
What is the best DIY kitchen upgrade for the biggest visual change?
Prioritize lighting—especially under-cabinet lighting—then coordinate hardware and faucet finishes. Those updates affect the whole room without demolition.
Can cabinets be painted without sanding?
Light scuff-sanding is strongly recommended for durability. If sanding is minimized, thorough degreasing and a high-quality bonding primer designed for slick surfaces become even more important.
Do peel-and-stick backsplashes last?
They can last for years when installed on clean, smooth, dry walls with proper pressure during application. Avoid high-heat zones right behind gas ranges unless the product is specifically rated for that location.
Recommended for you


Montessori Counting Sticks: Easy Math Play for Kids
May 28, 2026









Leave a comment