-
Shop
- Advanced Technologies
- AI Skills Mastery 2026 Collection
- Beauty
- Best-Sellers
- Calvin Klein
- Car Accessories
- Car Buying & Ownership
- Dating & Social Confidence
- Dating & Social Skills
- Denim
- 7FOR
- AGOLDE
- Antony Morato
- Armani Exchange
- Boss
- Brunello Cucinelli
- Calvin Klein Jeans
- Costume National
- Desigual
- Diesel
- Dolce & Gabbana
- Dsquared²
- Ermanno Scervino
- Fendi
- Gianni Lupo
- Guess Jeans
- Ichi
- Just Cavalli
- Lee
- Levi's
- Liu Jo
- Morgan De Toi
- Mother Denim
- Only
- Pepe Jeans
- Pinko
- Replay
- Tommy Hilfiger Jeans
- Valentino
- Vero Moda
- Digital Resources
- Education & Learning
- Family & Parenting
- Fashion
- Alexander McQueen
- Bags & Wallets
- Balenciaga
- Belts
- Bottega Veneta
- Brunello Cucinelli
- Burberry
- Chanel
- Chloé
- Dior
- Dolce & Gabbana
- Etro
- Fendi
- Gucci
- Hats & Hair Accessories
- Jacquemus
- Jewelry
- Jil Sander
- Jimmy Choo
- Keychains
- Kiton
- Miu Miu
- Off-White
- Prada
- Rick Owens
- Saint Laurent
- Shoes
- Socks & Tights
- Sunglasses
- The Row
- Tom Ford
- Valentino
- Valentino Garavani
- Versace
- Vivienne Westwood
- Watches
- Fashion & Style
- Fashion Accessories
- Financial Education
- Find Your Path Collection
- Fitness
- Furniture
- Gadgets
- Health & Beauty
- Health & Wellness
- Home & Garden
- Home & Kitchen
- Home Styling & Organization
- Home Supplies
- Kids & Babies
- Kitchen
- Lighting
- Nike
- Online Business
- Online Business for Beginners
- Parenting
- Patio, Lawn & Garden
- Personal Growth
- Pet Care
- Pet Supplies
- Pets
- Smart Life with IA
- Sport & Outdoors
- Super Deals
- Travel
- Wealth
- Wealth Building
- Wellness
- YouTube Shorts Best-Sellers
- Popular
- Best deals
Tempered Glass Rectangular Vessel Sink + Waterfall Faucet
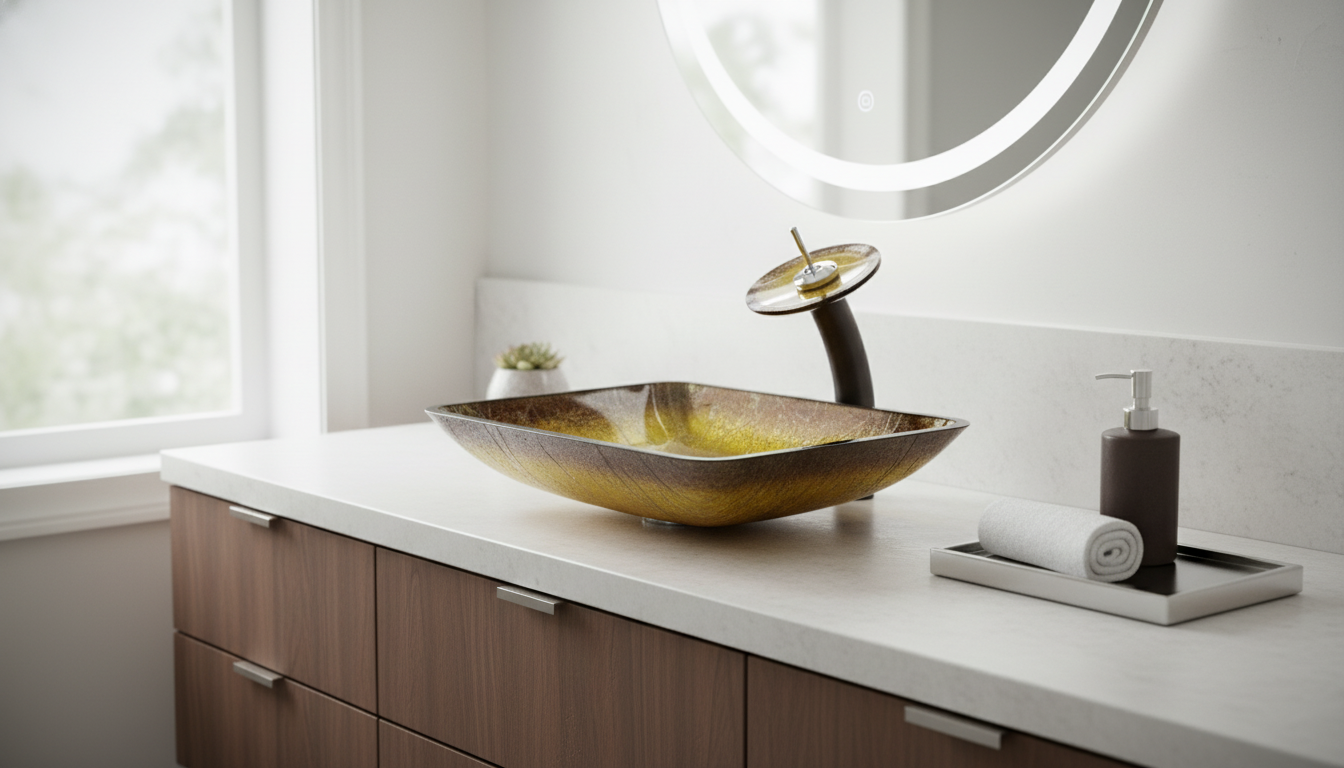
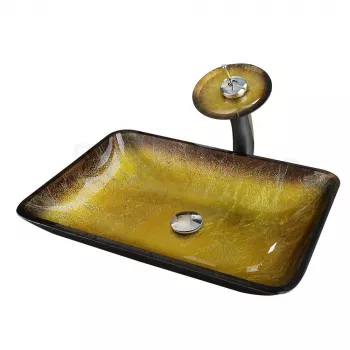
Rectangular Tempered Glass Bathroom Vessel Sink with Waterfall Faucet
A rectangular tempered glass vessel sink paired with a waterfall faucet creates a crisp, spa-like focal point on a vanity while staying practical for everyday routines. The best results come from understanding tempered glass safety, choosing a faucet with the right height and reach, and installing everything with the right gaskets and sealant so leaks, wobble, and splash are kept to a minimum.
Why tempered glass works for vessel sinks
Tempered glass is heat-treated to boost impact resistance compared with standard (annealed) glass, which is why it’s widely used in wet, high-traffic spaces. If it ever fails, tempered glass is designed to break into small, relatively blunt pieces instead of long, sharp shards—an important safety detail for bathrooms. Guidance around architectural glazing safety can be found through the Consumer Product Safety Commission (CPSC).
A vessel design also keeps the basin above the countertop, creating a modern profile while helping protect the vanity top from standing water—so long as the base is properly supported and sealed. With a rectangular shape, the clean lines pair naturally with contemporary vanities, floating cabinets, and minimalist hardware.
Waterfall faucet feel and function
A waterfall spout typically produces a wider, sheet-like flow that feels softer and more “spa” than a narrow stream. That relaxed look works especially well with glass, since you can see the water’s movement as it lands in the bowl.
To keep the experience pleasant (and your mirror and countertop dry), the spout height and reach should match the basin depth and drain position so the water lands near the center. A spout that’s too high or too short can cause splash-back on a vessel sink, especially with higher water pressure.
For daily use, prioritize a smooth lever action and corrosion-resistant finishes that hold up to humidity, frequent handwashing, and occasional cleaning products. Bathroom planning best practices—like comfortable reach and clearances—are also aligned with the National Kitchen & Bath Association (NKBA) bathroom planning guidelines.
What to check before buying
Vessel setups are straightforward when the vanity, faucet, and drain components are compatible. Before ordering, verify a few measurements and plumbing details:
- Vanity and countertop readiness: confirm the countertop can support a vessel sink and has the correct hole configuration for the faucet (single-hole, widespread, or wall-mount).
- Faucet pairing: verify spout height and spout reach are appropriate for a vessel basin to minimize splash-back.
- Drain compatibility: vessel sinks commonly use a standard bathroom drain opening; ensure a compatible pop-up or grid drain style and check whether an overflow is present (many glass vessels do not include overflow).
- Water lines and shutoff valves: confirm existing supply lines can connect to the faucet and are accessible after installation.
- Clearance and ergonomics: measure total sink height plus faucet height to ensure comfortable handwashing and mirror clearance.
Quick compatibility checklist
| Item | What to confirm | Why it matters |
|---|---|---|
| Countertop hole(s) | Matches the faucet mounting type | Prevents re-drilling and reduces install complexity |
| Spout height | High enough to clear the vessel rim | Avoids awkward hand positioning |
| Spout reach | Targets the basin center | Helps reduce splashing and water spots |
| Drain style | Overflow vs. no-overflow compatibility | Helps prevent slow draining or leak-prone setups |
| Sealant plan | Silicone at the sink-to-counter contact points | Protects the vanity top from moisture intrusion |
Installation overview (countertop vessel setup)
Most installations follow a similar sequence, but always follow the included instructions for your specific sink, faucet, and drain hardware.
- Dry-fit first: place the sink on the countertop and confirm it sits flat; use the recommended padding or gasket if included.
- Mount the faucet: install the faucet according to its mounting type and tighten hardware evenly to avoid stressing glass or the countertop.
- Install the drain assembly: use the correct gaskets; tighten to a firm seal without over-torquing.
- Seal the base: apply a neat bead of bathroom-grade silicone where the sink meets the countertop; allow full cure time before use.
- Test slowly: turn on water gradually, check all joints for leaks, and test the drain for smooth, fast flow.
Care and cleaning for clear, spot-free glass
Glass looks its best when water and minerals don’t have time to dry on the surface. A simple routine keeps it bright and low-maintenance.
Design pairing ideas for a clean-lined vanity
For an extra spa note—especially in powder rooms—soft ambient moisture can complement the clean-glass aesthetic. A small desktop-friendly option like the Mini USB Aroma Humidifier & Essential Oil Diffuser with Soft LED Light can add a calm finishing touch without crowding the countertop.
Common concerns and practical solutions
Featured in-stock picks
- Rectangular Tempered Glass Bathroom Vessel Sink with Waterfall Faucet — a modern vessel-and-faucet pairing designed to create a crisp focal point while staying functional for daily handwashing.
- Mini USB Aroma Humidifier & Essential Oil Diffuser with Soft LED Light — a simple add-on for a more spa-inspired vanity area.
FAQ
What are the two types of tempered glass?
The two common categories are thermal-tempered glass (heat-treated and rapidly cooled to create surface compression) and chemically strengthened glass (treated in a bath that swaps ions to build compressive stress at the surface). Thermal tempering is common for sinks because it’s cost-effective at larger sizes and is designed to break into small granules rather than sharp shards for improved safety.
Is tempered glass good for a table top?
Yes—when the glass is thick enough, edges are properly finished, and the tabletop is evenly supported to avoid point loads. Tempered glass offers improved impact resistance and a safer break pattern, but it still isn’t unbreakable, so heavy impacts and uneven support should be avoided.
Recommended for you

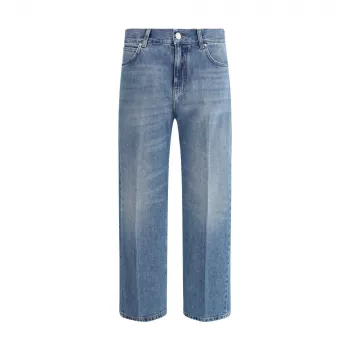
Best Wide Leg Jeans Brand: Why Pinko Stands Out
May 5, 2026


Leave a comment